Palo Alto Networks, Inc. is a network and enterprise security company based in Santa Clara, California. The company’s core products are a platform that includes advanced firewalls designed to provide network security, visibility and granular control of network activity based on application, user, and content identification and cloud-based offerings that extend those firewalls to cover other aspects of security.
LAB overview
Ok, I used UNL to deploy the LAB. UNL is a great tool which I highly recommended.I am running UNL in SERVER with Intel-VT chipset that supports virtualization, for more information on how to set up UNL visit http://www.unetlab.com/
Here is my topology

The Lab consist of:-
1- Two PA- VM100 that works in HA pair.
2-Active Directory ( I used window server 2012 evaluation copy 180-day).
3-Zones
Inside
Outside
DMZ
4-The Active Directory ( AD) connected to the LAB through the Management switch , It also connects the PA management interfaces.
5- The outer switch used to connect the PA(s) outside interfaces for internet access and also connect my outside host used for testing ( window machine).
6-The DMZ switch to connect a cisco router used as DMZ HTTP server.
7-The Inside switch used to connect inside hosts ( window machine).
BASIC SETUP
The first step we need to sign up at support.paloaltonetworks.com .Downloading the PAN-OS for VM-Series KVM Base Images. Later after we install the KVM image in inside UNL will need to register the VMs.
As we had created the LAB,will start the PAN FWs and monitor the starting process.

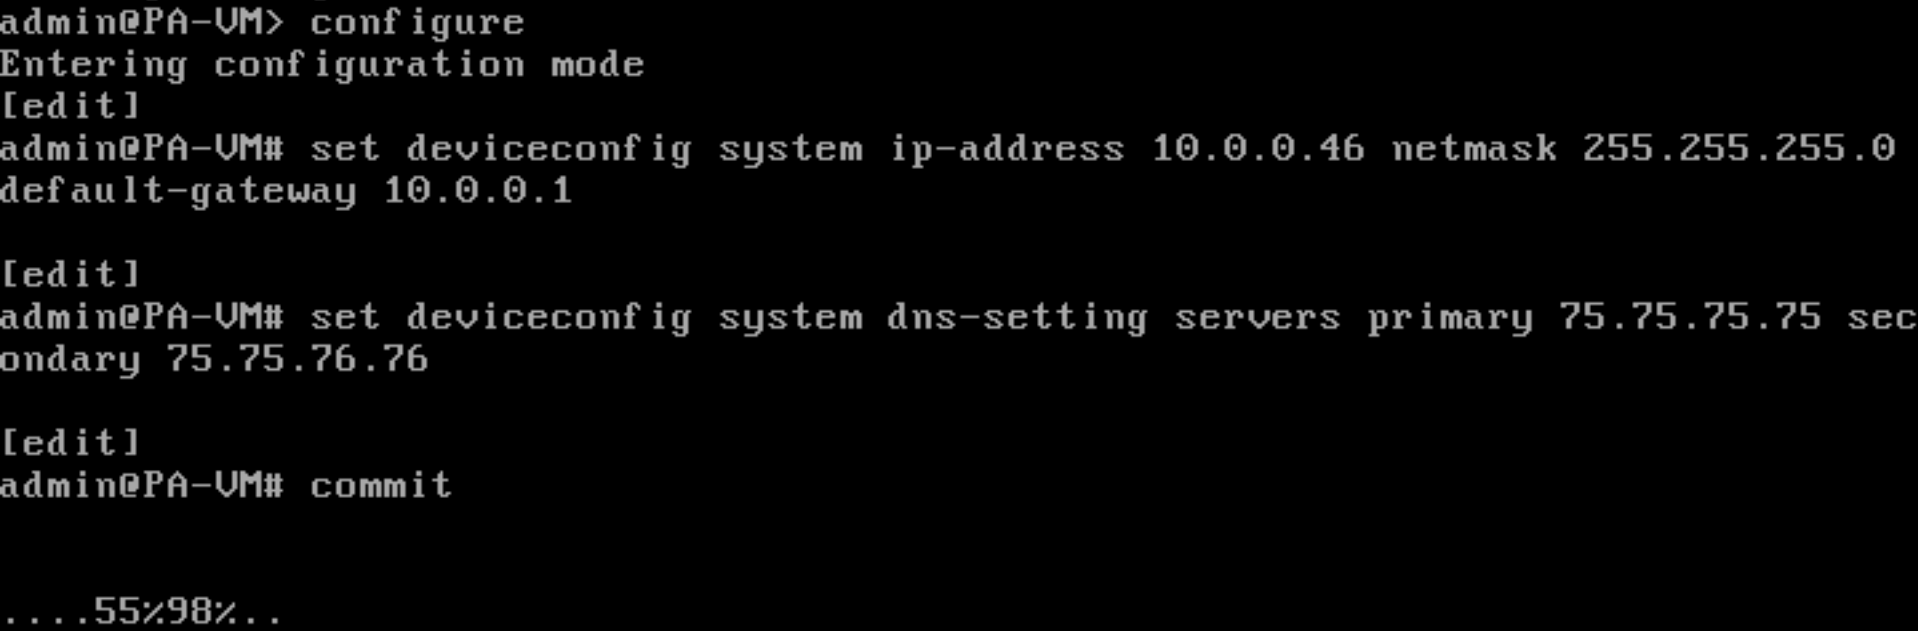
Once the boot process completed , We enter the configuration mode and set up the management IP address, Default gateway , DNS and commit the changes.
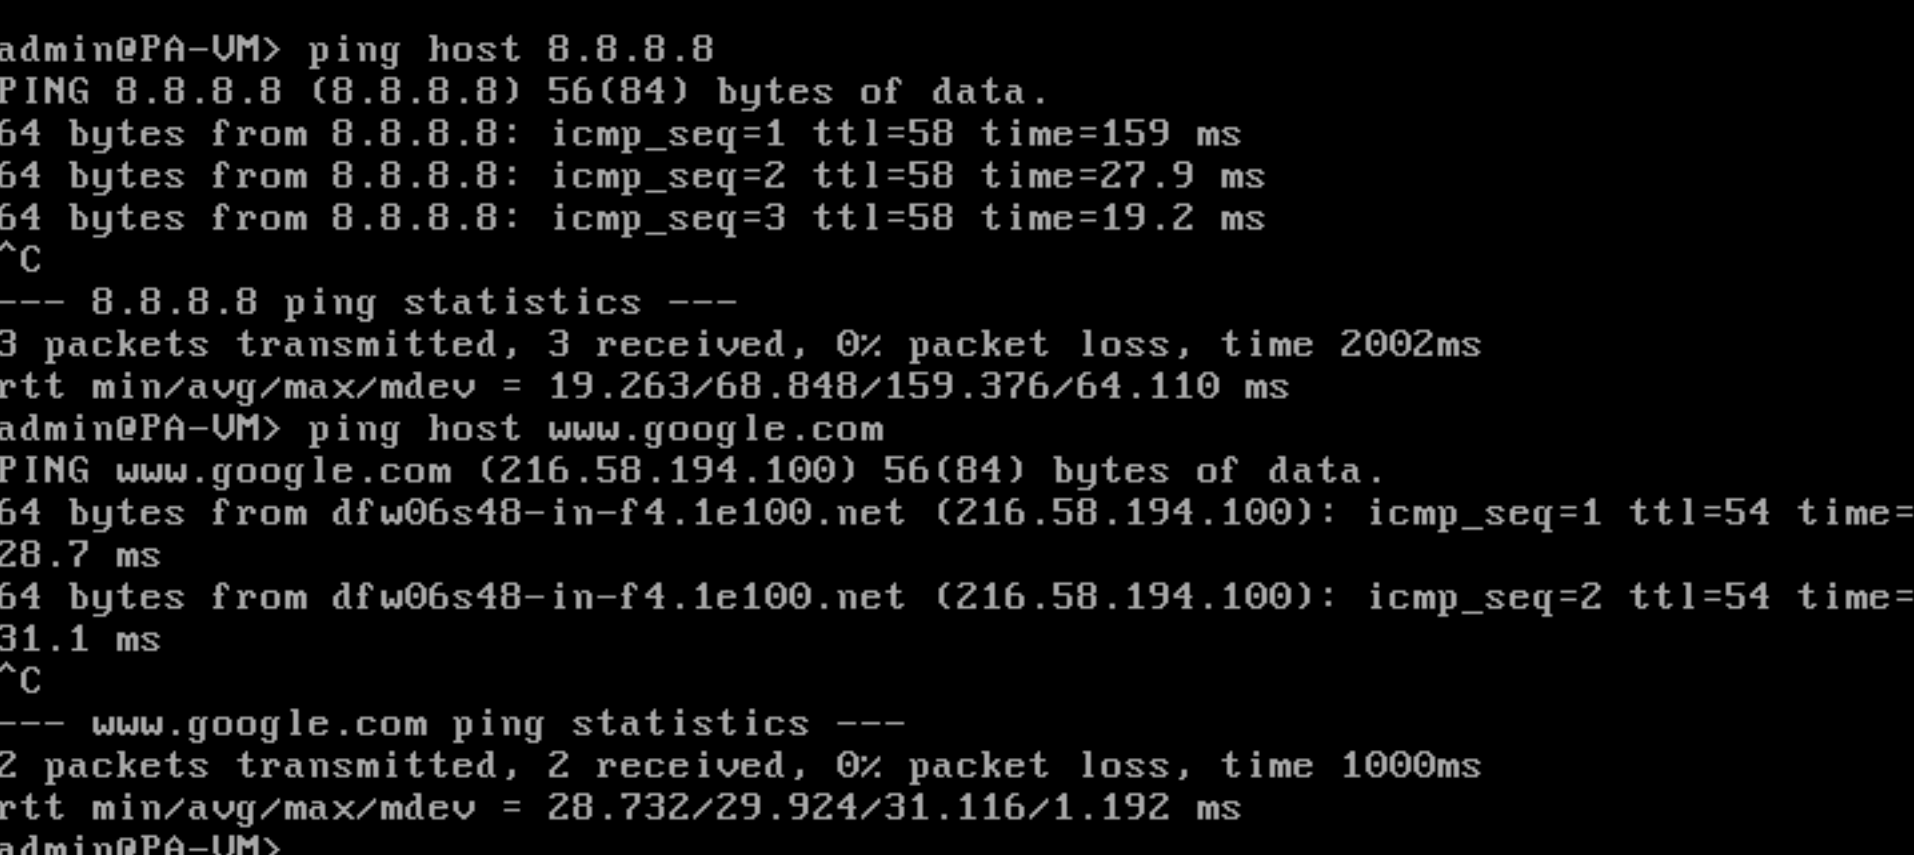
Test Internet Access using the following commands
ping host 8.8.8.8
ping host www.google.com
Use browser to access the PA page the default username and password admin/admin
I prefer to use chrome or Firefox
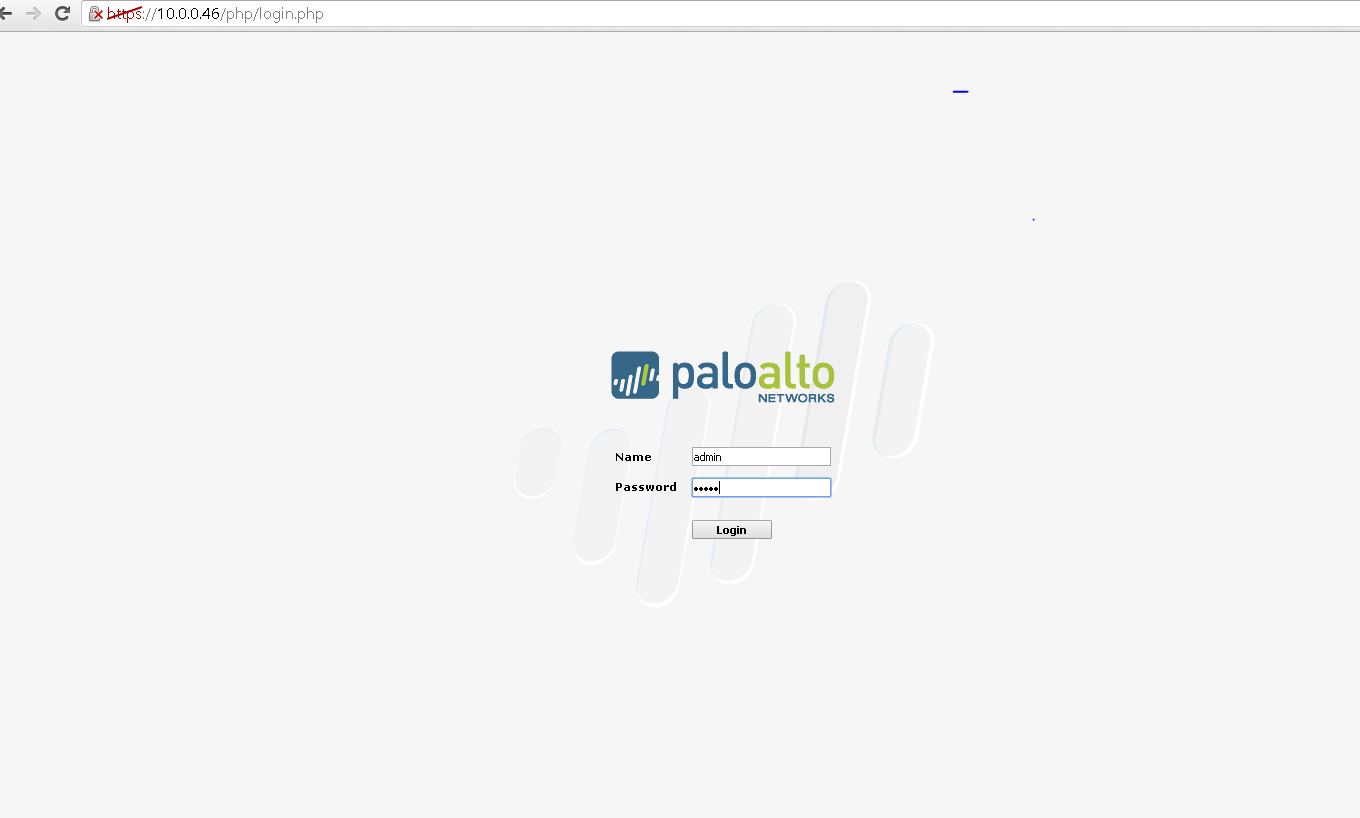
The login page had the General Information which contain the CPUID and UUID, that we can use to register the PA in support.paloaltonetworks.com.

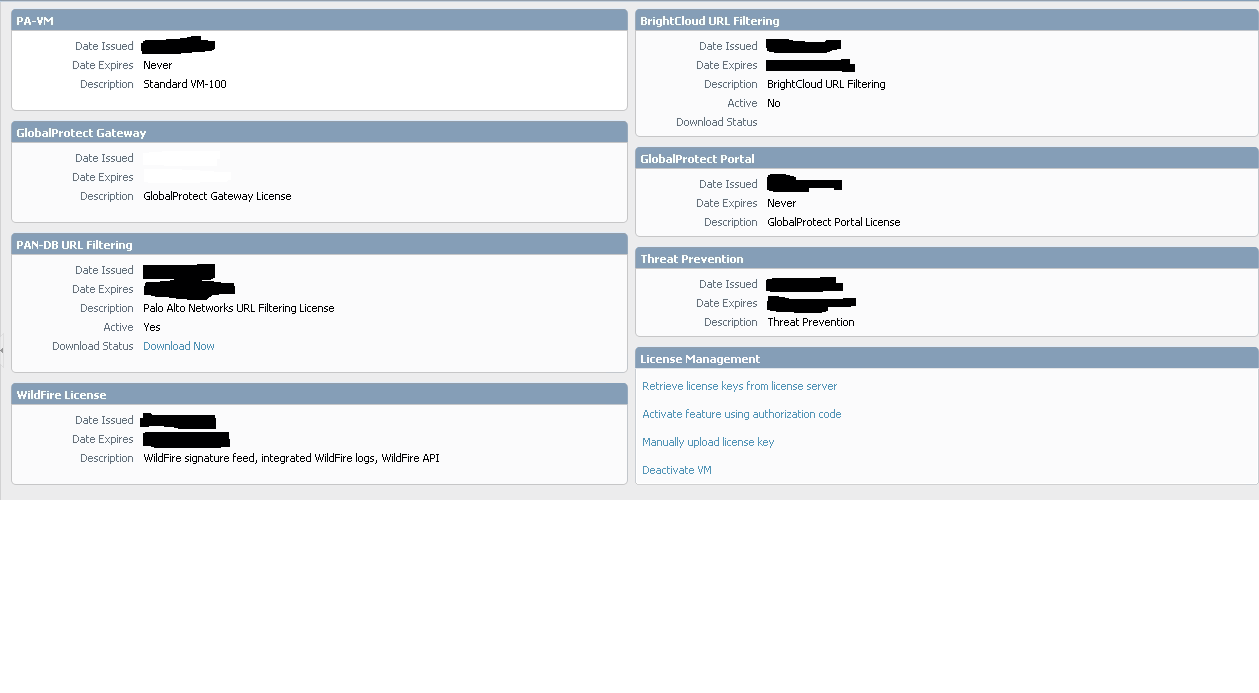
Licensing
The next step is License.To obtain the license, Palo Alto has a CPUID and UUID.Both in combination with the Authentication Code can be used to register the VM.I had evaluation license in my case it will be valid for one month only
There is multiple ways to install the license I usually used one of the following:-
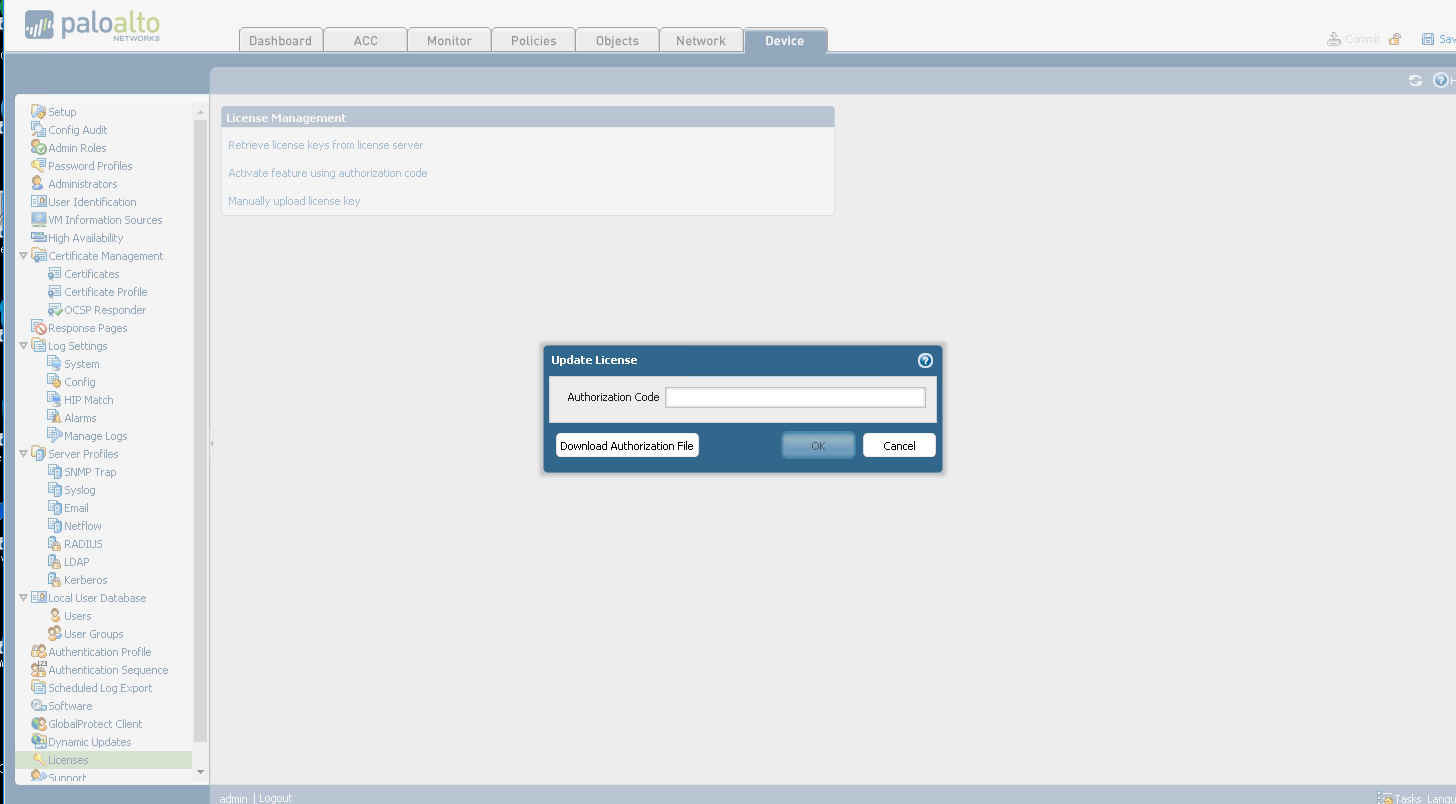
Authentication Code
Should have valid account with Palo alto in order to be able to get one
First go Device tab —-> licenses —–> activate feature using authorization code , then Insert the Authorization code .After reboot The PA will have license installed.
UUID AND CPUID registration in the PA web site
Login to the support.paloaltonetworks.com with your account.
Go to ASSETS tab and under VM-Series-Codes register the VM


Type the UUID and CPUID then submit

The registration should be successful then back to Palo Alto page
Go to device —-> Licenses —>retrieve license keys from license server
You should now have License installed
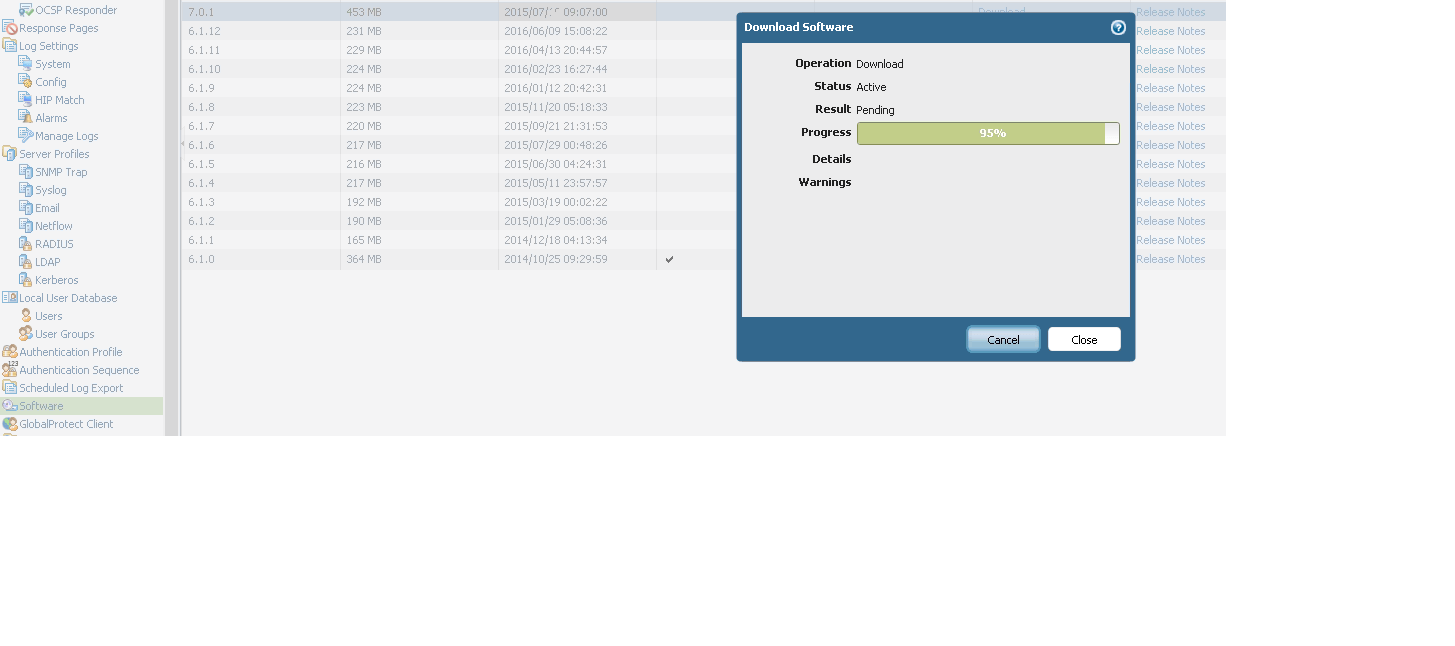
Upgrade the code
In my case I have code 6.1.0 in UNL , I need to upgrade to 7.0.1
Go to Device–>Software choose the code you want to download , click download and wait to complete.
When clicking on install the downloaded code, you will get a warning message; that upgrade needs to review the release notes as it will change the default behavior. In Production, this should be done with careful as this may interrupt the service. Also, some features may configure in a different way.We must review the release notes and compare before any upgrade
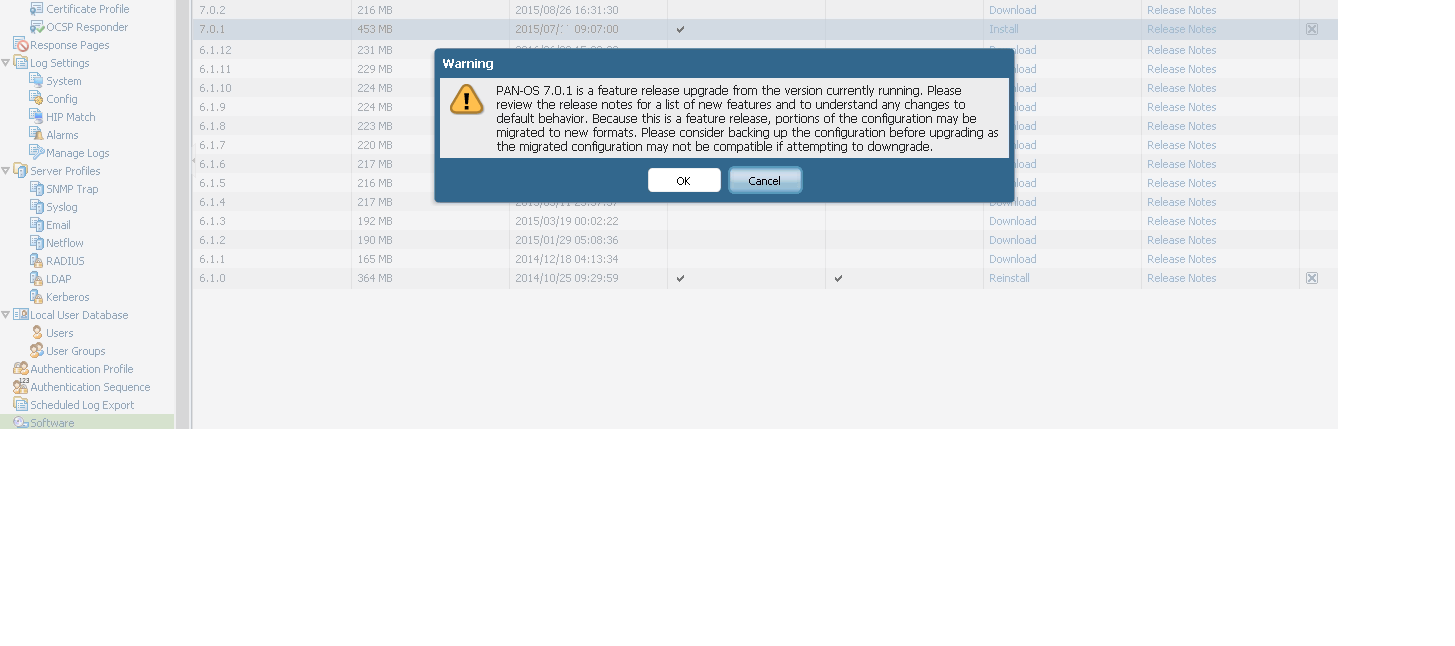
If you get a fail to install, this is because the need to run dynamic updates to install some applications and threats before proceeding.
to do so go to Device –>Dynamic Updates–> download

Install the downloaded updates.

The other thing, it’s best practice to upgrade in stages. For example, if you want to upgrade from 6.0 to 7.1.3 first upgrade from 6.0 to 7.0 and then from 7.0 to 7.1.3 ( sometimes Palo Alto upgrade fails if jump directly to the latest code when running older code)
After installing the applications, you should be able to upgrade to the new code
Click yes to reboot the device
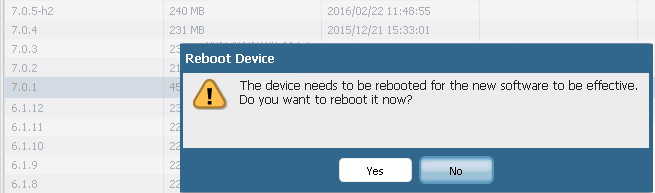
The VM now running on the new code

Resources
https://en.wikipedia.org/wiki/Palo_Alto_Networks>
http://www.unetlab.com/documentation/index.html
https://www.cbtnuggets.com/it-training/palo-alto-networks-firewall